MAXREFDES99


Overview
設計リソース
デバイス・ドライバ
コンポーネントのデジタル・インターフェースとを介して通信するために使用されるCコードやFPGAコードなどのソフトウェアです。
説明
Introduction
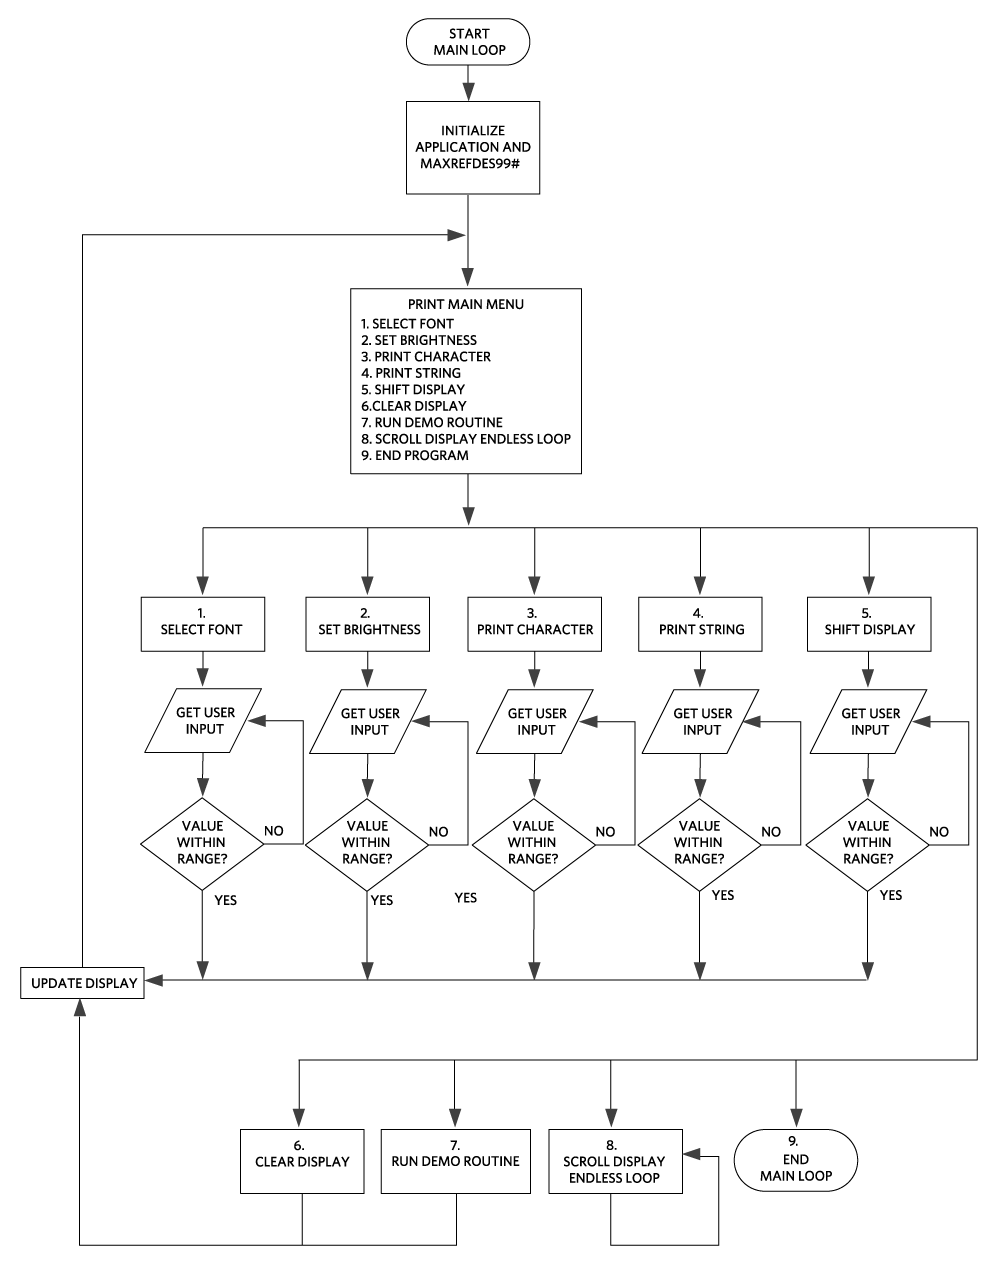
LEDs, both low cost and available in many configurations, continue to dramatically transform signage and lighting. The MAX7219 has long been the developer’s best friend in LED driving, offering both simplicity and flexibility. Most systems, however, drive 8x8 arrays, limiting the amount of communication, specifically character size, and not utilizing the daisy chain feature of the MAX7219. 16x16 displays, in contrast, provide the capability to display most international alpha-numeric characters.
Enter the MAXREFDES99#, which drives a 16x16 display, making it a powerful tool for prototyping and developing applications.
The MAXREFDES99# is mbed and Arduino compatible, allowing fast development for both platforms. The shield contains four daisy-chained MAX7219s that drive four 8x8 red LED dot-matrix displays installed on the top arranged to make a 16x16-matrix display.
機能と利点
Features
- Flexible 16x16 Dot Matrix Display
- mbed.org library
- Arduino library
- Arduino form-factor shield
Competitive Advantages
- Portable
- Compact
- Flexible
- Cost Effective
Details Section

Documentation & Resources
-
MAXREFDES99 Design Files2021/02/17ZIP17 M
Support & Training
Search our knowledge base for answers to your technical questions. Our dedicated team of Applications Engineers are also available to answer your technical questions.