AN-1338: ADM1278 Design Guide
Introduction
The following design guide is intended to be used with the ADM1278 Microsoft® Excel®-based design tool, the ADM1278 Hot Swap Designer. The headings in this application note correspond to the numbered headings in the design tool.
System Specifications
Enter the system specifications. For example, critical specifications can be as follows:
- VIN = 12 V ± 5% (supply voltage)
- ICB = 70 A (circuit breaker trip current)
- CLOAD = 3000 µF (total load capacitance)
- TA_MAX 60°C (ambient temperature)
UV Pin Threshold
An internal comparator with a 1 V reference detects the UV pin falling threshold.

where:
RUV1 is the top resistor in the resistor divider string on the UV pin divider from VIN to ground.
RUV2 is the bottom resistor in the resistor divider string on the UV pin divider from VIN to ground.
The UV pin has 60 mV of hysteresis, so the rising threshold can also be calculated as:
UVRISING = UVFALLING + (UVFALLING × 60 mV)
A decoupling capacitor can also be added to the UV pin if required. This capacitor extends the glitch filter time of the UV pin.
OV Pin Threshold
An internal comparator with a 1 V reference detects the OV pin rising threshold.

where:
ROV1 is the top resistor in the resistor divider string on the OV pin divider from VIN to ground.
ROV2 is the bottom resistor in the resistor divider string on the OV pin divider from VIN to ground.
The OV pin has 60 mV of hysteresis, so the falling threshold can also be calculated as:
OVFALLING = OVRISING - (OVRISING × 60 mV)
A decoupling capacitor can be added to the OV pin if required. This capacitor extends the glitch filter time of the OV pin.
Current Limit Settings
The sense voltage (VSENSE) can be programmed within a 5 mV to 25 mV range using the ISET pin. The range of 15 mV to 25 mV is recommended for optimum accuracy.
For example, to configure a regulation current limit (IREG) of 73 A, the sense resistance (RSENSE) is calculated as:

This RSENSE value is not a commonly available resistor, so the closest to consider is 0.25 mΩ (for example, two 0.5 mΩ resistors in parallel).
VSENSE = RSENSE × IREG = 0.25 mΩ × 73 ≈ 18.25 mV
VISET = VSENSE × 50 = 18.25 mV × 50 = 0.912 V
Because the VCAP pin has a limited load current specification, the top ISET resistor (RISET1) is kept relatively large, (for example, 10 kΩ to 100 kΩ). The bottom resistor (RISET2) can then be adjusted to provide the required sense voltage limit.
The ISET pin can be tied directly to the VCAP pin to configure the default 20 mV current limit. Enter 20 mV as the target VSENSE value to configure the default current limit.
Up to four sense resistors can be selected in parallel. A general guideline is to allow a 10% imbalance between resistors. Resistors must also be sufficiently thermally derated. For example, a resistor that is rated for 2 W must not be dissipating more than ~1 W. The TT Electronics ULR3 series of resistors, or equivalent, is recommended. The ULR3 resistor is a 3 W, 2512 case size resistor. See the EVAL-ADM1278EBZ user guide for the recommended sense resistor footprint when using the ULR3 resistors.
Averaging resistors are required when using multiple sense resistors. A 10 Ω averaging resistor at each sense resistor terminal is recommended.
The minimum, maximum, and nominal circuit breaker current limits and regulation current limit are shown in the tool after the sense resistor and ISET resistor values are populated.
FET Selection
Generally, the maximum current must not exceed approximately 25 A to 30 A per field effect transistor (FET) for a typical power metal-oxide semiconductor field effect transistor (MOSFET) in an LFPAK case size. This guideline gives an indication of the number of FETs that are required.
The first consideration as criteria for selection of a suitable MOSFET is the drain source on-resistance (RDSON) specification. The RDSON value determines how much power is dissipated in the MOSFET when it is fully enhanced in normal operation.
The ADM1278 features a high voltage gate drive which generates a minimum gate-to-source voltage (VGS) of 10 V to achieve the lowest specified RDSON. The gate drive circuit is designed to achieve this gate drive while still ensuring the 20 V maximum VGS specification is not violated.
The temperature rise in the MOSFET during normal operation is directly proportional to the RDSON of the MOSFET. This temperature rise impacts the derating factor required to maintain the safe operating area (SOA) of the MOSFET. As the temperature of the MOSFET increases, its power rating is reduced, or derated. In addition, running MOSFETs at high temperatures may decrease their reliability.
Begin by estimating the required RDSON. Check the maximum dc current calculated previously in Section 4 of the design tool (Current Limit Settings). Assume there is a maximum dc current of 75 A for the purposes of these calculations. Then, using the maximum ambient temperature specified in Section 1 (System Specifications), estimate the power loss in the MOSFET(s). First, make the following assumptions:
- Junction to ambient thermal resistance of the MOSFET (RTHJA) = 40°C/W (this rating must not be exceeded)
- TJMAX = 120°C (this is the maximum preferred MOSFET junction temperature, keeping well below any silicon limits)
First, calculate the junction temperature rise.
TRISE = TJMAX − TAMAX = 120°C − 60°C = 60°C
Then, calculate the power for a single FET.

Then, calculate the total RDSON.
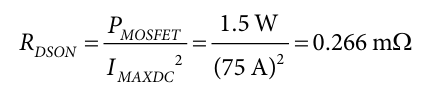
This RDSON value is far too small for a single FET, so calculate it with three FETs in parallel, instead.

Reduce this RDSON value by 10% to create a margin for imbalance, due to layout asymmetry, and a further 1.4 factor to allow some derating.

Taking this RDSON value as the target RDSON, search for suitable FETs. The search can be narrowed to FETs that fit the following profile:
- VDS = 25 V to 30 V (20 V is possible, but is not preferred).
- VGS = 20 V
- RDSON ≤ 1.4 mΩ.
- TJMAX = 175°C (150°C is possible, but 175°C allows for a lower temperature derate factor. This is the silicon limit for the MOSFET. The maximum junction temperature is still targeted at 120°C to avoid thermal runaway).
After selecting a suitable MOSFET, quantify the RDSON temperature derate required. There is typically a graph of RDSON vs. TJ in the MOSFET data sheet. An example of normalized RDSON vs. TJ is shown in Figure 1.


Figure 1. Normalized RDSON vs Junction Temperature (TJ).
Using a TJMAX of 120°C, the RDSON increases by a factor of approximately 1.4. It is recommended to keep TJ ≤ 120°C.
After a suitable MOSFET is selected, the remainder of Section 5 (FET Selection) of the design tool can be populated. The threshold voltage (VGS(TH)), the reverse transfer capacitance (CRSS), and the input capacitance (CISS) values can usually be found in the specification table or in the typical performance characteristics of the MOSFET data sheet.
Determine Thermal Power Derating Factors
The worst case temperature rise is calculated based on data entered previously. A derating factor (DF) of approximately 2 or less is recommended to avoid thermal runaway.
where:
TCSOA is the SOA case temperature (for example, 25°C).
TCMAX is the case temperature at TJMAX.
VOUT Ramp Time
The gate capacitor (CGATE) limits the inrush current and allows the output voltage to come up in a linear ramp. The capacitor must be large enough to ensure that the inrush current is low enough to not trip the circuit breaker threshold. Start with a 10 nF capacitor and increase its value until the inrush current is low enough and the tool no longer gives a warning. Typical values for the gate capacitor are 22 nF or 33 nF.
The gate capacitor value can also be chosen to give a desired power-up ramp time. For example, to configure a power-up ramp of 20 ms,

where:
tUP = 20 ms power-up ramp time.
IGATE = 25 µA.
VIN = nominal supply voltage.
NumFETs is the number of MOSFETs.
CRSS_PER_FET is the reverse transfer capacitance per FET.
Round up the gate capacitor to the nearest available value.
SOA
Copy the chosen MOSFET SOA into the FET SOA tab of the design tool. It is recommended to use the 1 ms SOA time for the calculations because SOA times are not easy to predict in between the characterized times on the SOA plot. Fill out the SOA values in the table for Section 8 of the FET SOA tab to allow the tool to calculate the maximum allowable power for each SOA time.
PSET
The ADM1278 utilizes a constant power foldback technique to protect the MOSFETs in the event of overcurrent faults or short circuits. The VDS of the MOSFET is monitored. The current limit is adjusted based on the VDS of the MOSFET to maintain a constant power limit. See Figure 2 for an example of this relationship.


The ADM1278 design tool calculates the maximum constant power value to ensure that the MOSFET SOA is maintained. It also calculates the minimum constant power value to ensure that the constant power threshold is not tripped at power-up. Choose the power limit somewhere close to the center of this range to allow margin at each side. The typical value for the FET power limit in a design is 250 W.
After the FET power limit is chosen, the PSET resistor divider from the VCAP pin to ground can be selected to give the required PSET voltage. The MOSFET SOA must be checked at the constant power setting selected. Click on the link in Section 9 of the FET SOA tab and enter the approximate SOA time at the derated constant power level. Check the design worksheet for any SOA warnings. The SOA time at this constant power level must be larger than the selected maximum SOA time (for example, the 1 ms SOA line that was recommended).
ISTART
The start-up current limit is a fixed current limit that is only active when PWRGD is bad (the PWRGD pin deasserted). This current limit can therefore detect any unexpectedly large inrush current during dv/dt power-up. During dv/dt power-up, the inrush current is typically less than the active current limit determined by the ISET pin or constant power foldback.
The ISTART pin is used to select the start-up current limit. It can be tied high to disable the start-up current limit, tied low for a default VSENSE limit of 2 mV, or it can be configured with a resistor divider to the VCAP pin to configure a specific current limit.

where:
RISTART1 is the top resistor in the resistor divider string on the ISTART pin from the VCAP pin to ground.
RISTART2 is the bottom resistor in the resistor divider string on the ISTART pin from the VCAP pin to ground.

where:
StartUPCL is the start-up current limit at initial power-up.
AVCSAMP = 50 V/V (gain of current sense amplifier).
The start-up current limit must be greater than the maximum expected inrush current to ensure that the circuit breaker threshold is not tripped during a normal dv/dt power-up ramp. The start-up current-limit threshold is typically set in between the maximum expected inrush current and the minimum constant power current limit. If the maximum expected inrush current is 5 A, the start-up current limit is typically set to approximately 10 A.
After a start-up current limit is selected, the ISTART resistor divider on the VCAP pin can be configured in the ADM1278 design tool.
It is also possible to program the start-up current limit via the PMBus interface. See the ADM1278 data sheet for more details.
MOFSET SOA Analysis at Power-Up
One final MOSFET SOA check is required for the worst case FET power at power-up. The MOSFET SOA time for a powerup ramp is estimated in Section 10 of the FET SOA tab. After entering the appropriate time, check the design worksheet again for any warnings. The SOA time must be larger than the maximum power-up time that was calculated.
Timer
The TIMER pin capacitor (CTIMER) is used for fault protection. When the ADM1278 is configured to power up in a linear ramp, the TIMER pin threshold is normally tripped only during a fault condition. As such, the regulation period of the TIMER pin can be considered as a glitch filter time for fault conditions. For high current designs, it is recommended to set this fault filter time to approximately 100 μs to 500 μs duration. A CTIMER capacitor value of 10 nF to 22 nF is recommended.
PWGIN Pin
The PWRGD pin is an open-drain output pin and is pulled low in the following cases:
- There is a fault condition that has not been cleared
- The controller has not signaled that the hot swap can be enabled
- The power-good input threshold has not been exceeded
The PWRGD falling threshold is set by a resistor divider on the PWGIN pin.

where:
RPWGIN1 is the top resistor in the resistor divider string on the PWGIN pin divider from VOUT to ground.
RPWGIN2 is the bottom resistor in the resistor divider string on the PWGIN pin divider from VOUT to ground.
The PWGIN pin has 60 mV of hysteresis, so the rising threshold can also be calculated as:
PWGINRISING = PWGINFALLING + (PWGINFALLING × 60 mV)
Recommended Circuit
Assuming there are no warnings, the design is complete. Click on the link in the design tool to go to the tab with the schematic and the bill of materials that is generated from the design.
Author
